Atlassian Bamboo: an Opinionated Approach

Table of Contents
This is the introduction related to my experience on using Atlassian Bamboo / MSBuild / MSDeploy / IIS, I will cover the build process / setup in the coming articles.
Preface #
This is an article talking about my experience (≠ 100% solution. ≠ golden rule on CI/CD) on using Atlassian Bamboo. It is a tool for continuous integration, deployment, and delivery. I use this tool for all the .NET-based web applications running on the Windows ecosystem.
Note on 2020: Bitbucket Pipelines is a newer service created by Atlassian. If you are building applications other then Windows, macOS, or iOS applications then I strongly recommend you to use this instead of Bamboo.
CI/CD principles #
In my opinion, when you start designing your CI/CD workflows:
- Make things predictable.
- Think of the deployment (CD) first, then work backward to the integration (CI) part.
- Use Gitflow in your source code.
Fundamentals of Bamboo #
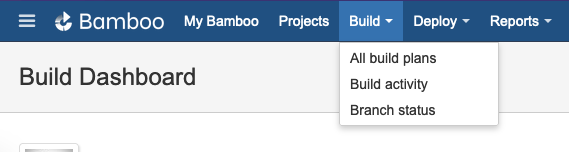
The menu in Bamboo (version 6.5.0) contains 3 parts:
- Projects,
- Build and
- Deploy.

Deployment (CD) #
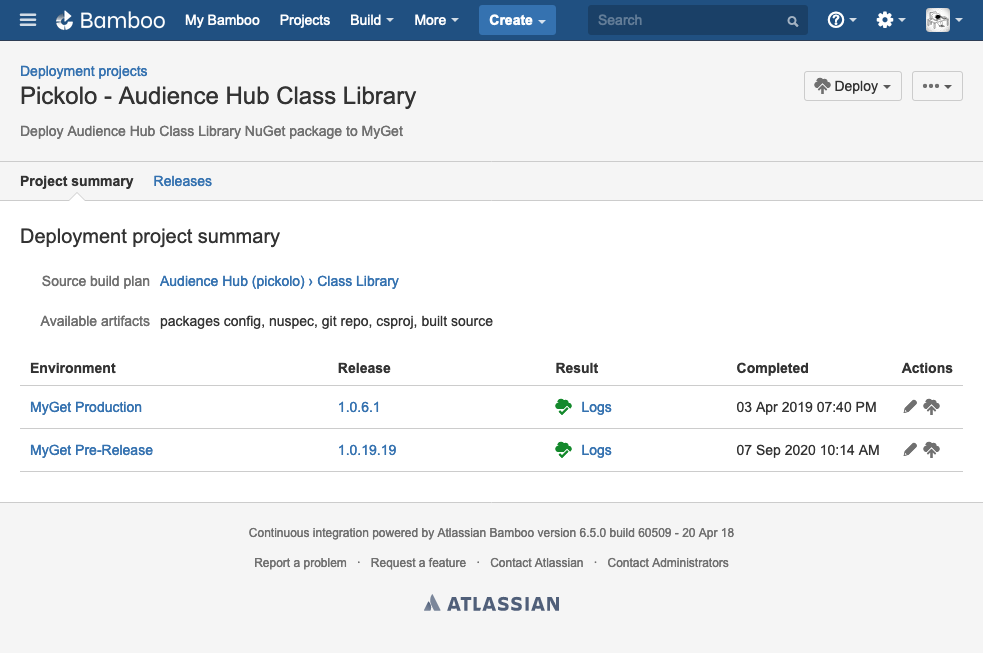
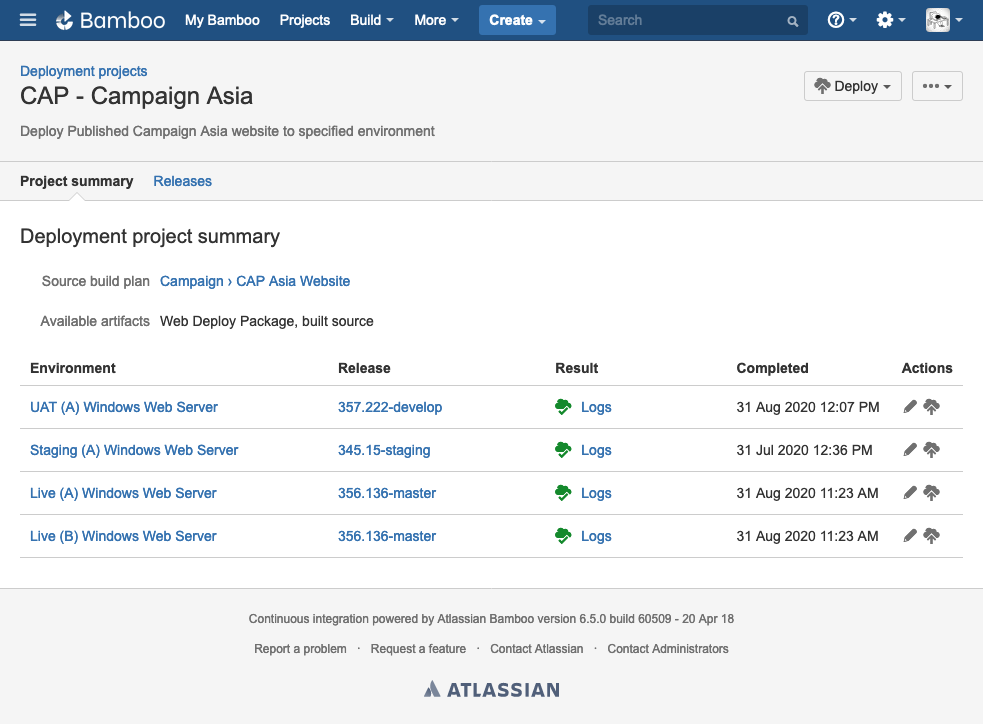
Here is a typical deployment project summary looks like:
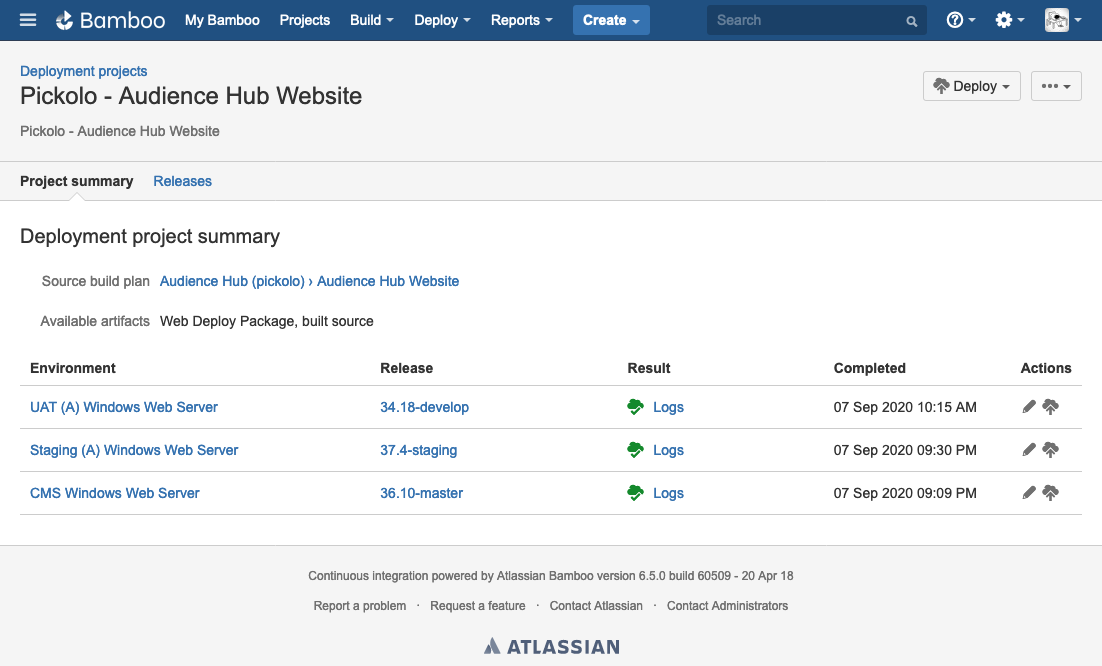
You can check this out by clicking Deploy > All Deployment Projects. After that, choose one of the item on the list.
Glossary #
Artifact: The content built in the CI part.
Deployment Environment: The place the artifacts should go to.
Release: A unique (and usually auto-increment) identifier of this deployment.
Deployment Project: A collection of build plans.
Build (CI) #
Here is a typical build dashboard:
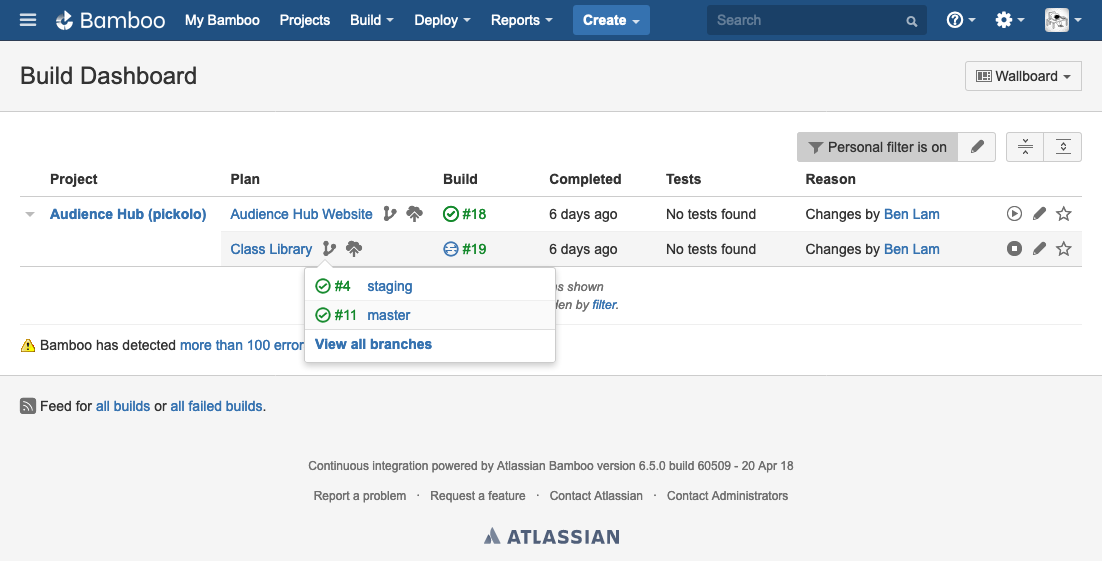
This is the default front page of Bamboo. You can also check this out by clicking Build > All Build Plans.
Glossary #
Build: The build result of the default plan.
Build Plan: Usually it refers to the definitions of all build-related configuratoins. However, sometimes it also refers to the default build barnch or the default branch configurations.
I will try to avoid using the term build plan in this article as it is a bit confusing. I will use :
default branch configuratoins to indicate the default settings of a build plan;
default build branch to indicate the branch associated to the default branch configuratoins.
When I use the word build plan, it refers to the item listed under Plan column in the build dashboard.
Build Project: Similar to Deployment Project, it’s a collection of build plans.
Git #
From the basic assumption in the CI/CD principles, pt. 3 all the repositories are using Gitflow. I will use the following conventions when talking about the CI settings.
Default build branch: git’s develop branch.
Build branch: All the other git’s branches, including feature/*, release/*, hotfix/*, master
Master branch: git’s master branch
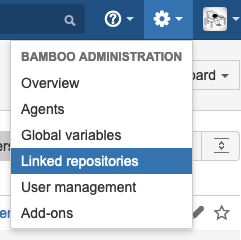
Linked Repository: Store all the git repository connection setups for later user in CI/CD steps. It’s under ⚙️ (Bamboo Administration) > Linked repositories.
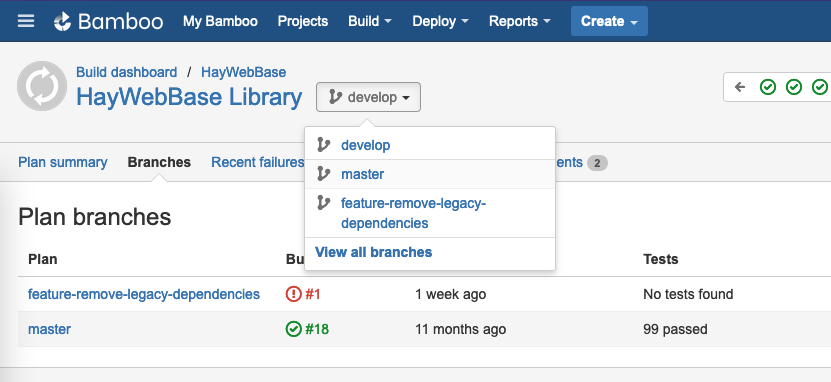
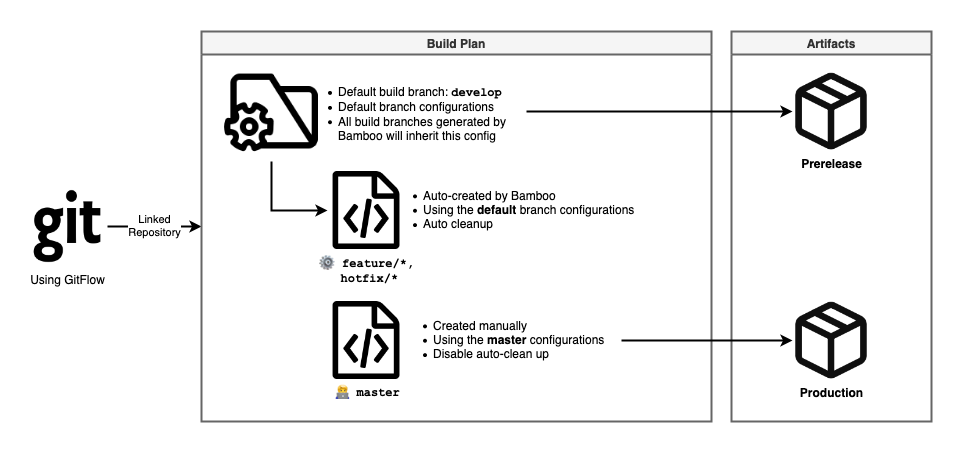
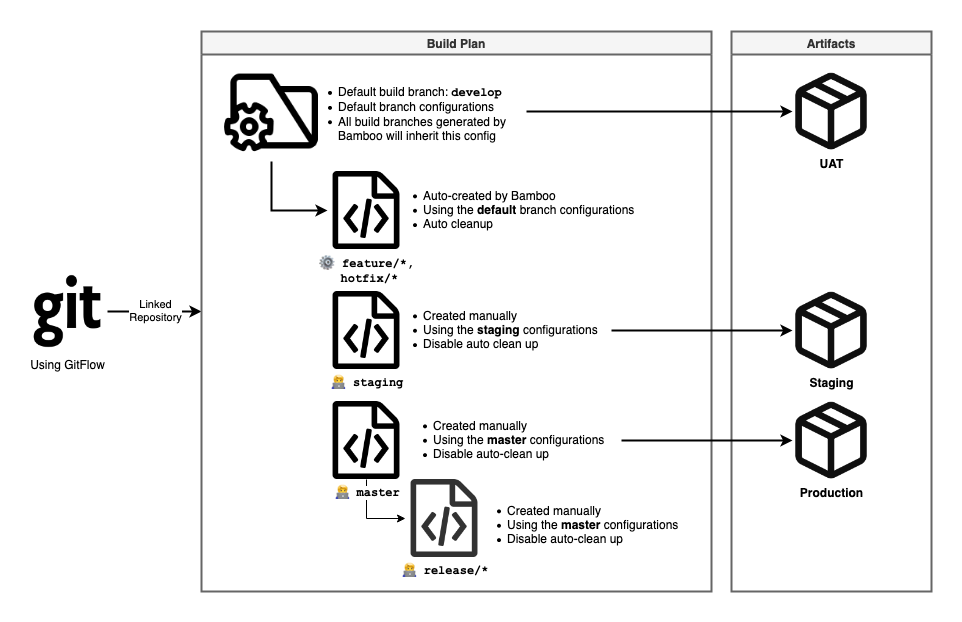
This is an example for a class library:
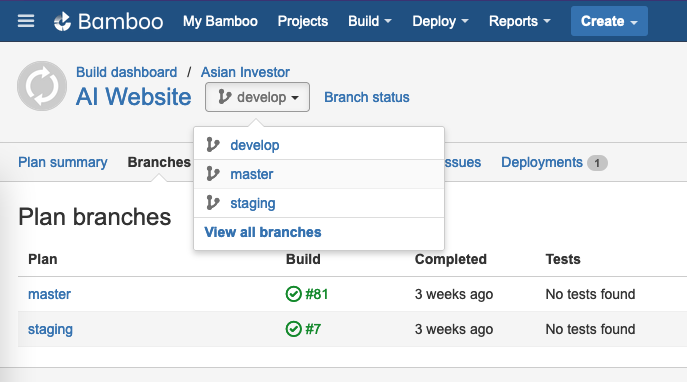
And this is an example for website:
Next, I will talk about how to design a CD flow, then a CI flow.
Designing a CI/CD workflow #
Assumption: you are using gitflow to manage your git repository.
In short:
Deployment
- 1 deoloyment project, many deployment plans.
- 1 destination, 1 deployment plan.
Integration
- 1 Bitbucket git repository, (usually) 1 Bamboo build plan
- build the
developbranch using default plan configuration - git branch <–> Branch config of a build plan
- build the
- 1 Bitbucket project, 1Bamboo build project
Deployment (CD) #
All the deployments in my team can be categorized in to 2 types: either a library (i.e. a nuget package) or a website (i.e. an IIS website).
Nuget Packages #
My team is using MyGet to host private packages. So, there is only 1 destination for my artifact goes.
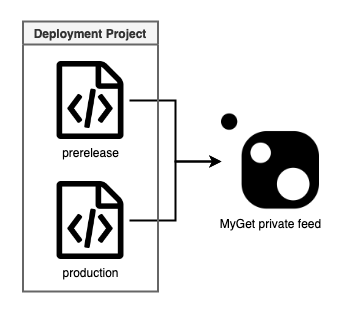
This is how I organize the deployment project:
Deployment Project
├── Production environment: for builds from master
└── Pre-release environment: all other branches
Websites #
We have 2 web servers for production and other environments has a corresponding web server. All running IIS. On the other hand, some of the websites are hosting under a sub-directory (as a sub-site).
Therefore, an artifact may goes to multiple destinations.
In my design, 1 deployment environment responsibles for 1 destination (i.e. 1 IIS web server).

So you may ask: why not 1 deployment environment for 1 environment? Here’s why:
1-to-1 mapping of deployment environment and IIS website #
The bad #
One of the downside is: It takes longer time to deploy all websites. Consider the case of deploying 2 deployment projects at the same time, and each project has multiple deployment environments. The sequence of deployment activities can be:
- deploy site A to environment A
- deploy site B to environment A
- deploy site A to environment B (triggered by activity 1.)
- deploy site B to environment B (triggered by activity 2.)
Which means I have to wait for the deployment of another website.
The good #
The biggest advantage of doing so is that modefying one deployment environment does not affect any settings of the other deployment environments. Then, I can do the following things:
- A/B testing
- Rollback the version of a specific web server
- Check out the audit log / deployment history for a particular web server
Moreover, you can see the status of all environments in the All Deployment Projects page (Deploy > All Deployment Projects).
- If deployment of a particular web server is failed, I am able to find out which server is it easily
- Plus, I can just re-deploy to that particuler web server
You can create a new deployment environment by cloning an existing one (from the same deployment project or from another one). Thus, this is not a tedious task.
(I am not sure about the above observation and please do let me know if I got something wrong or there are any better solutions.)
My decision #
This is how I organize the deployment project:
Deployment Project
├── Production (A) environment: for builds from master / release
├── Production (B) environment: for builds from master / release
├── Staging environment: all other branches
└── UAT environment: all other branches
Build (CI) #
Similarly, my team has to build nuget packages, .NET Framework and .NET Core web applications.
In my case, the CI part has a close relationship with the gitflow.
Nuget Packages #
I need to build 2 kinds of artifacts:
- Testing package: Prerelease;
- Production package; Release (used by other solutions/projects in production) deployment.
Plan/Branch configurations #
(See the Websites section.)
Websites #
I need to build 2-3 kinds of artifacts:
- For UAT environment;
- For Staging environment (this environment is not 24/7 and will be set up when necessary);
- For Production environment.
Default configurations: develop
#
For the default settings in a build plan, always choose the develop as the main branch and allow Bamboo to create/remove all the feature/*, hotfix/* branches.
Production configurations: master
#
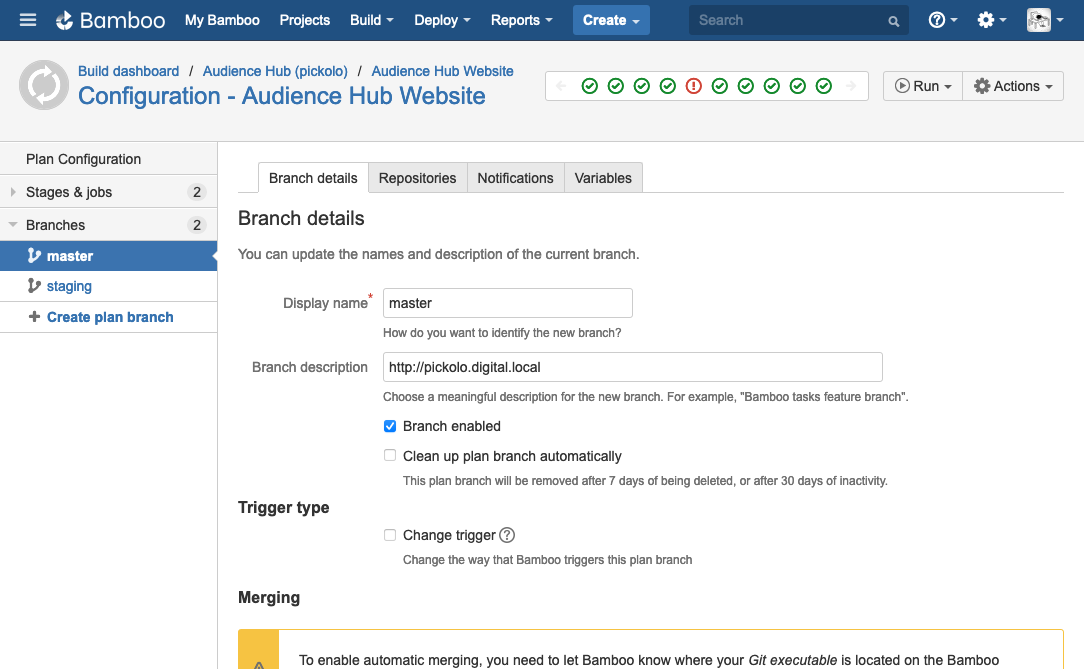
Define a build plan for master branch. Uncheck Clean up plan branch automatically under Branch details tab to prevent this branch being deleted by Bamboo.
Note on release branches
#
I ususlly not using release branch. When I use that, I will set up a build branch manually, just like the master.
Staging configurations: staging
#
Just like the set up of production configurations. However, change the variables for the staging environment.
You may also need to override the default branch configurations under the Variables tab.
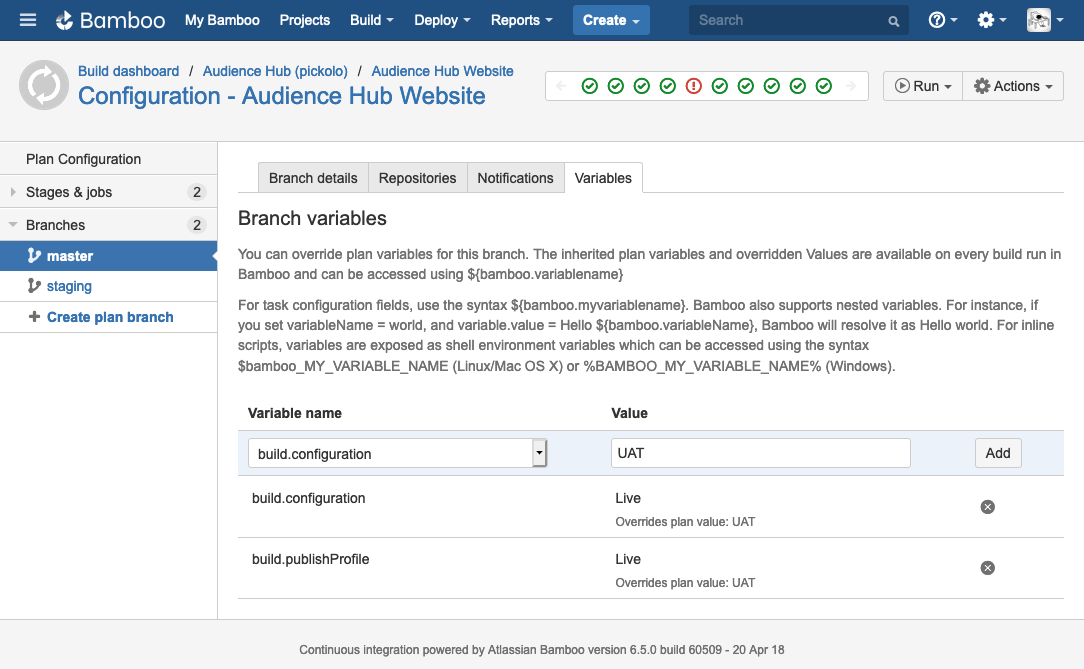
You can find these tabs under form the top menu: Build > All build plans > 🖋 (right end of the plan) > (Choose the plan branch name).